Connecting to Exasol with Alteryx

Standard

Starting with Alteryx version 11.3 the In-DB tools now support a number of new connections, including Exasol. This greatly improves the speed when using Exasol and Alteryx in combination. Rather than bringing all the data from the database into Alteryx, the In-DB tools create a SQL query that is sent to and executed directly in Exasol. As long as you are using the In-DB tools all processes you are performing will be computed directly in Exasol. I can bring in over 800m rows in under a second and use the In-DB tools to manipulate these data at the speeds I am used to from Exasol.

Setting up a new connection:

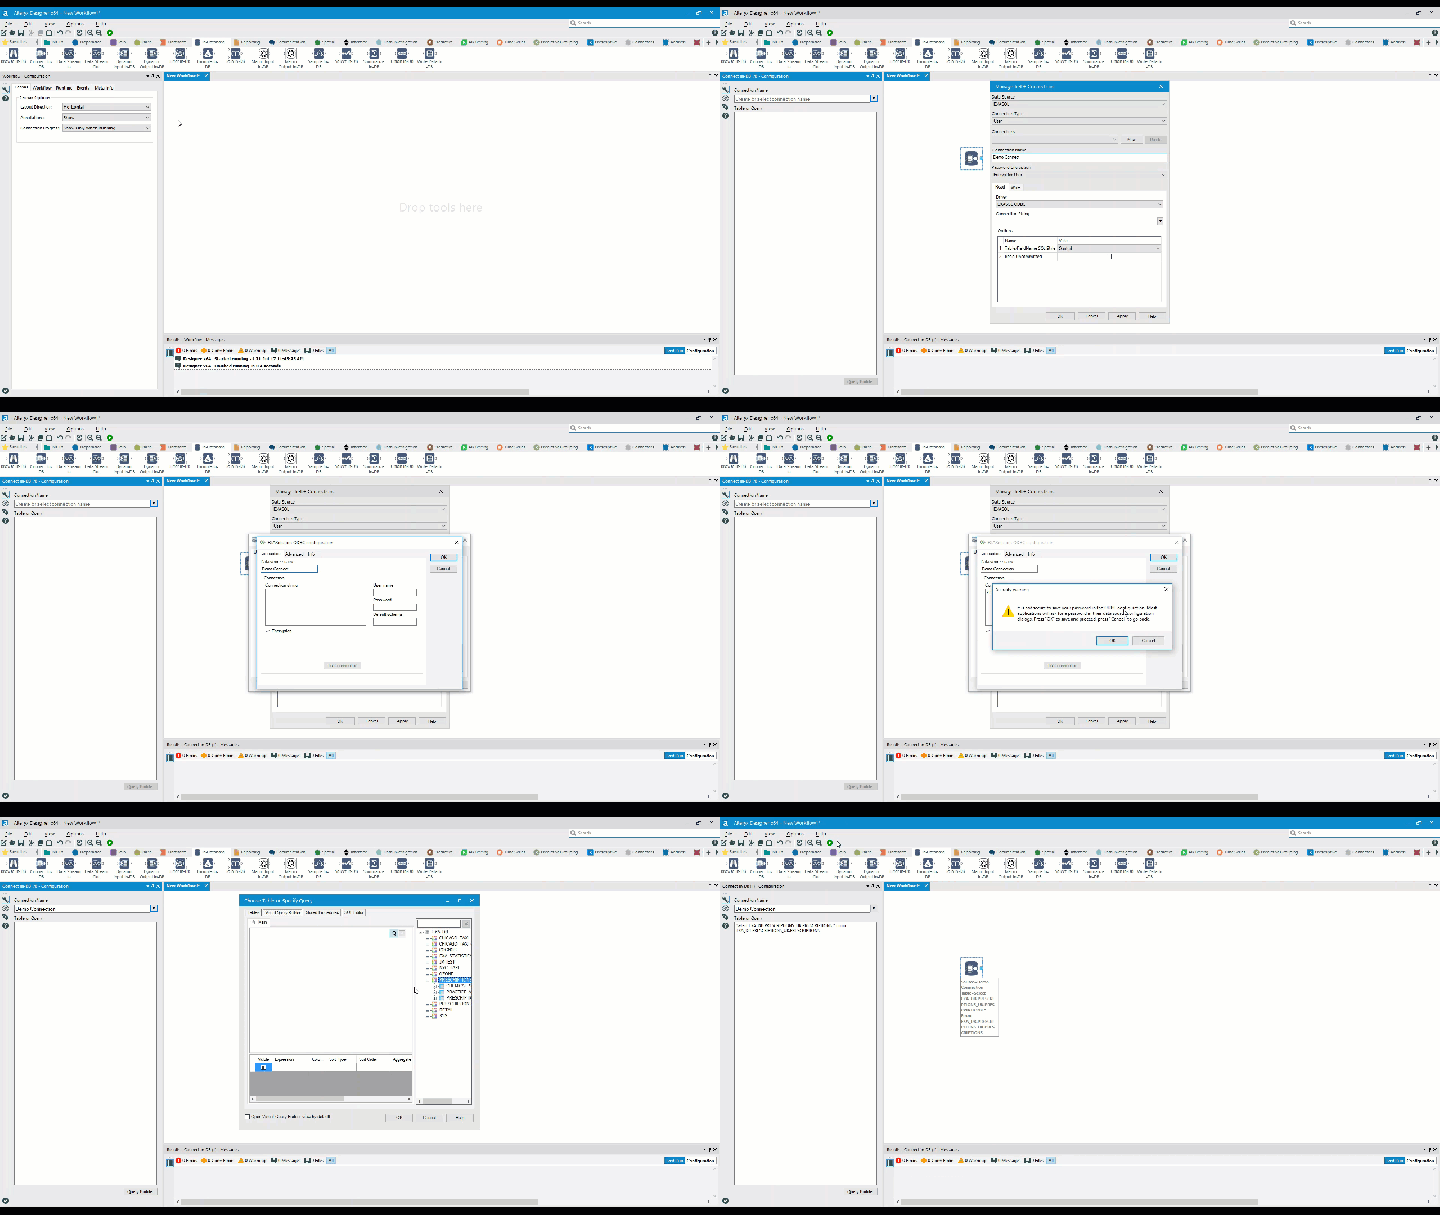
  1. Drag in the “Connect In-DB” tool
  2. In the configuration pane select “Manage Connections…”
  3. A new window will pop up
  4. In the “Data Source” drop down you can now select “EXASOL” as your data source
  5. Under “Connections” press the “New” button
  6. Use the “Connection Name” space to give your connection a unique name to recognise it later
  7. Select the downward arrow next to the “Connection String” field, this will bring up a list of ODBC connections created previously if you have any. If the ODBC connection is already set up you can select it here, else press “New database connection”
  8. In the new window that pops up, select “ODBC Admin” on the bottom left of the window
  9. The ODBC Data Source Administrator is brought up
  10. Select “Add”
  11. A new window appears. Select “EXASolution Driver” from the list and press “Finish” on the bottom right of the window
  12. In the connection configuration that now appears just enter the connection string. Entering your “User name” and “Password” is optional at this point. If you don’t enter them now you will be prompted for them every time you want to use this connection
  13. You can press the “Test connection” button to check that you have entered the connection string correctly
  14. Then confirm the information by selecting “OK” in the top right of the window
  15. Close the remaining windows by pressing the “OK” button in each instance
  16. The query builder will be brought up automatically at this point. Use this to select the data that you want to use
  17. Running the workflow will now connect Alteryx to the data you have selected from your Exasol database
connection gif.gif

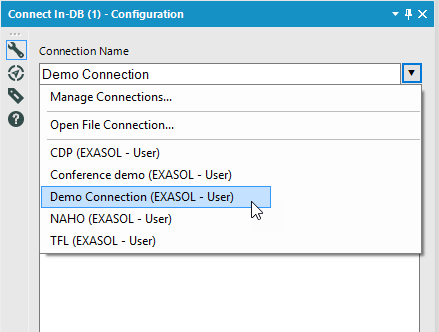
The next time you want to use this connection you don’t need to go through all these steps. Your connection profiles are saved and you can access them through the drop-down menu in the “Connect In-DB” tool.
2017-07-21_12-07-30


Getting started with Exasol for Tableau and Alteryx users – Connecting to Tableau

Standard

Using Exasol allows us to process large amounts of data at very high speeds and it works great in combination with Tableau. When you open Tableau and navigate to the connection types in the welcome view you will see that Tableau has a native connector (called EXASOL in v10.2 and EXASolution in previous versions). Once selected, a dialogue will prompt you to enter your credentials.

Tableau connection
  • Server: This is the IP address of the database
  • Port: This will usually be 8563 for Exasol
  • Username: The user name that was assigned by your database manager or that you specified when installing your personal version of Exasol
  • Password: The associated password with this user name. Again, this will have either been given to you when you received information about your schema or you will have specified this yourself during installation.

If you are using this connection for the first time you will probably receive an error message informing you that you haven’t got the necessary drivers to establish the connection. A link is included to a page where you can install this from the Exasol website.

Windows users: Navigate to the section ” Download ODBC Driver” and select the file called: EXASOL_ODBC-6.1.3-x86_64 .msi or EXASOL_ODBC-6.1.3-x86.msi. The version number in this case is 6.1.3 but there are other versions available as well.

Mac users: You are looking for a file that is called EXASOL_ODBC-6.1.0-MacOS.dmg or EXASOL_ODBC-6.2.rc1-MacOS.dmg. You will need to use the menu on the left of the page to navigate to either version 6.1.0 or 6.2.rc1 in order to find these files (At the time of writing these were the only two versions available for Mac but this might change in the future).

Once installed, return to the connection page in Tableau and try again. If everything is entered correctly you should now be connected to the database and will be shown the typical data source screen in Tableau, where you can select the schema you would like to connect to and interact with the tables just as you would with any flat file.

If you are having issues connecting even when entering the correct credentials or you cannot see any tables when connecting to the schema you are working with you may not have been given sufficient permissions by your database administrator.

Exasol will speed up your processes in Tableau and provide better performance than you will have when using flat files. However, aspects of Tableau’s performance are still dictated by rendering speeds within Tableau. Some views, for instance when creating a map with many individual locations, might still take a while to set up.

Exasol for Tableau and Alteryx users -Installing Exaplus

Standard

Having started my new Dataschool placement with Exasol recently, one of my first goals was to familiarise myself with the product.

I am given access to the company Exasol database so I don’t need to install my own instance. If your company doesn’t use Exasol or you want to create your own database for personal use you can download the Free Small Business Edition to store your own data.

Exaplus is the interface that sits on top of that database and allows you to interact with your data through SQL commands. It also supports several other programming languages such as python and R that enable you to analyse data directly in the database. You don’t need Exaplus to use Exasol with Tableau and Alteryx but I find it helpful to have that direct insight into my data and be able to test if connections are working.

I downloaded Exaplus from the Exasol website to interact with the schema that had been set up for me. You can download your own, free Exaplus from the downloads website. In the left pane you can select the newest version of Exasol, which at the moment is 6.0.0. Then, in the main view, scroll down to the list of latest downloads. The second item from the top is the ‘Download Client’ and you can see that the green file name is ‘Exaplus-6…’. Have a close look at the file name to identify the correct version for your system. Then just download and follow the instructions throughout the installation process.

Exaplus download